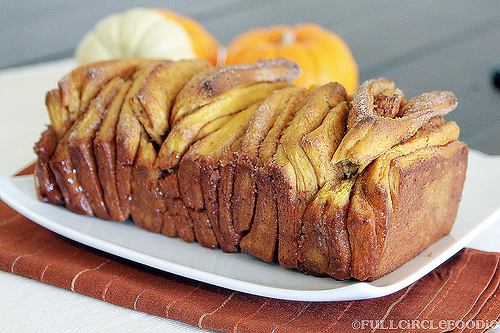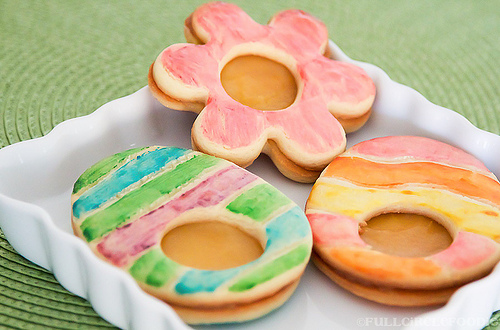
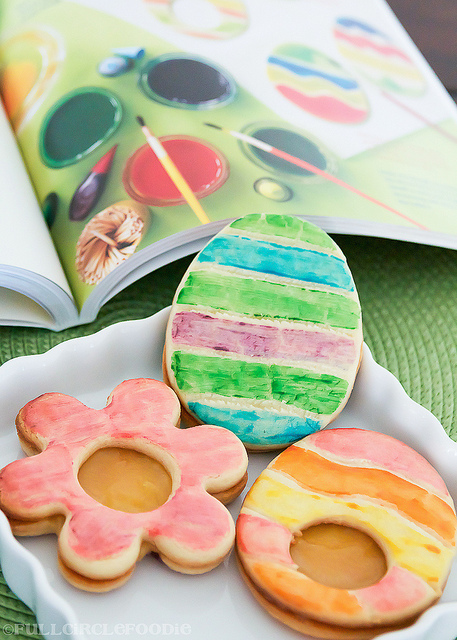
With absolutely gorgeous weather a few weeks ago, I couldn’t help but be in the mood for some colorful Spring baking. It’s even more fitting that I finally got around to posting these beauties on the first day of Spring!* I had recently received a copy of Cupcakes, Cookies & Pie, Oh My! and knew exactly what I wanted to try first: painted sugar cookies. These lemon filled sandwich cookies were the perfect combination of easy, delicious and guaranteed fun for the whole family.
Cupcakes, Cookies, & Pie, Oh My! Is the third book in the Hello, Cupcake! and What’s New, Cupcake? series by talented authors Karen Tack and Alan Richardson. Not only are the authors continuing to make adorable cupcake creations with new techniques (think camouflage), but they’re also transforming pie dough, cheesecakes, refrigerator cookies, pound cakes, bar cookies, Jell-O, and more! As always, there are treats for every holiday, and many of the recipes are completely no-bake, making them that much easier to create.
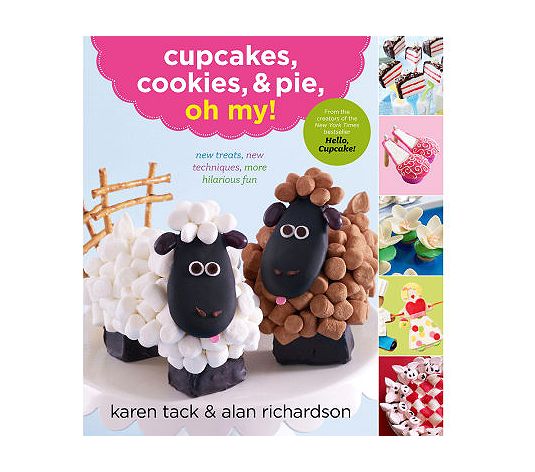
What I loved about this book is the semi-homemade aspect to each creation. The book is filled to the brim with ideas that are sure to impress your guests at your next party or holiday gathering. Each recipe is easy to follow with bright pictures and step by step instructions making them ideal for adults and children alike. Imagine how much fun you’d have gathering with friends and kids to paint your very own Easer eggs to take home?
Painted Sugar Cookies
inspired by Cupcakes, Cookies & Pie, Oh My!
Ingredients:
basic sugar cookie recipe of choice
1-2 egg whites
assorted food dyes (the cheap ones work best, gel food colorings do not mix well)
lemon curd
Preparation:
- Make sugar cookie dough according to directions and refrigerate for at least an hour.
- Roll dough out evenly to about 1/4 inch thin and cut with desired shapes. You’ll need two matching shapes per cookie, one left as is and one with a circle cut out. Transfer to baking sheet lined with parchment paper or silicone baking mat.
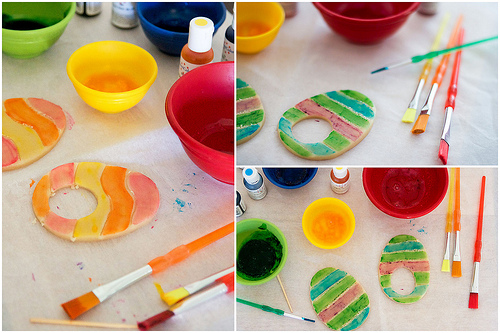
- Use a toothpick to lightly score your pattern on the dough, this will help the dyes from running.
- Separate egg whites into several bowls, one for each color, and add a few drops of food coloring until desired intensity is reached.
- Paint sections of cookies with various dyes and bake according to recipe directions.
- Allow cookies to cool completely and fill each pair with a thin layer of lemon curd.
The final step as encouraged by the book was to cover your toothpick lines with a thin piping of royal icing. This produces a much cleaner finished product, but since these were just for the two of us, I decided to skip that step. They turned out gorgeous either way, but I agree that the royal icing put these over the top as far as presentation goes.
If you don’t have a favorite sugar cookie recipe on hand, don’t fret. The book provides a delicious recipe along with additional step by step pictures to help you out. As always, get creative. Painting cookies doesn’t have to be limited to Easer eggs. I also enjoyed painting and filling Spring flowers, but any shape will do!
*My apologies for my recent absence. I promise I have tons of recipes and pictures to share with you, but life has been a tad overwhelming as of late. All is well in our neck of the woods, so please don’t worry! I’ll be back in the swing of things in no time, but bear with me as I sort out a few things.
**Although I received this copy of Cupcakes, Cookies & Pie, Oh My! for review, no monetary compensation was received and all opinions are strictly my own.
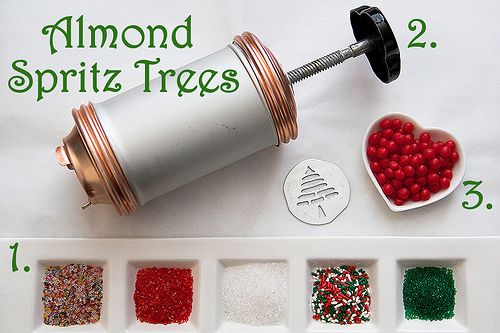
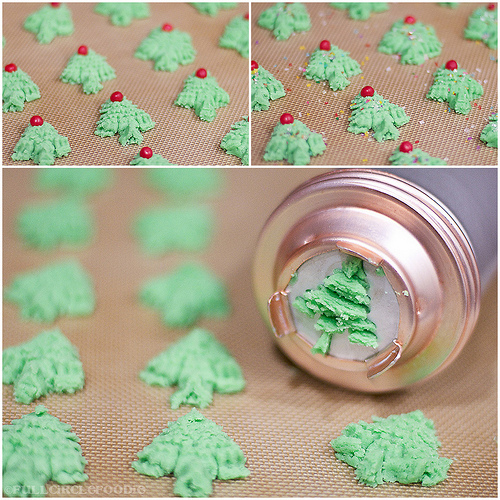
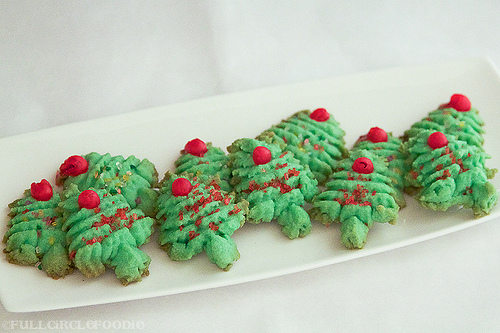
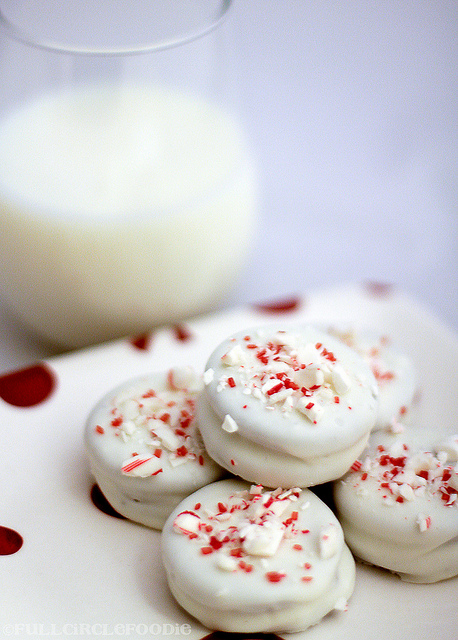
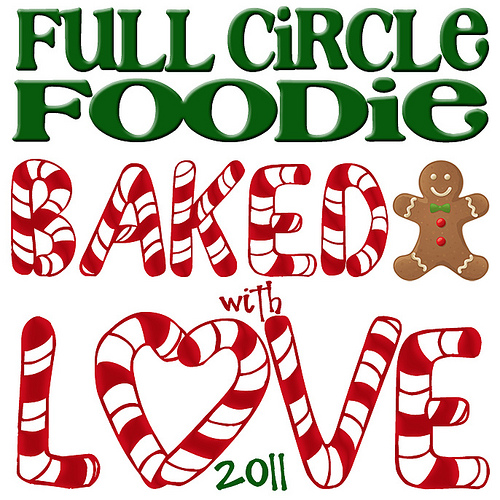 If you haven’t spent the holidays with Full Circle Foodie before, I’d like to extend a warm welcome. This is my fourth year in a row executing my “Baked with Love” project where I bake a variety of cookies and candies and then package them up all pretty to give, with love, to coworkers, friends, and family.